
If you know me at all, it’s no secret that I ship a LOT of things out. Most of the things I ship are gifts for my oily team. (I just really love sending happy mail, what can I say!?) There was a time that I would package everything up (We’re talking 20-40 packages at a time) lug them to the post office, and make everyone angry as the poor post office worker weighed and labeled everything. I even tried the whole going to Hy-Vee (a midwestern grocery store who offers USPS shipping services!) but even then I would find myself holding up the line behind me.
So that’s when I decided to learn how to do it all from home. Making better use of my time, and never having to leave my house 😉
Here’s what you need:
- A PayPal account.
- Shipping supplies. (I get everything I need, in bulk, on Amazon. Tape, boxes, multiple sized envelopes, etc.)
- A scale (again, Amazon!)
- A printer & labels. Until yesterday I used my normal printer with these labels. The problem is that I didn’t know about a setting that allowed you to turn off receipts in PayPal, so I was downloading labels to my computer, photoshopping them so that two were on a page, and THEN printing them. Oy. I invested in a thermal printer, which is going to cut time drastically, but if you cannot no worries! A normal printer and labels works just fine!! I will explain more about settings soon!
- Excel or Google Sheets
Now that you have everything you need, it’s time to set up everything to ship!!
In your Excel or Sheets spreadsheet, set it up to look like the following, and use this same sheet for all your shipping needs.

Once you have all your info in the spreadsheet for your shipments, download the sheet as a .csv
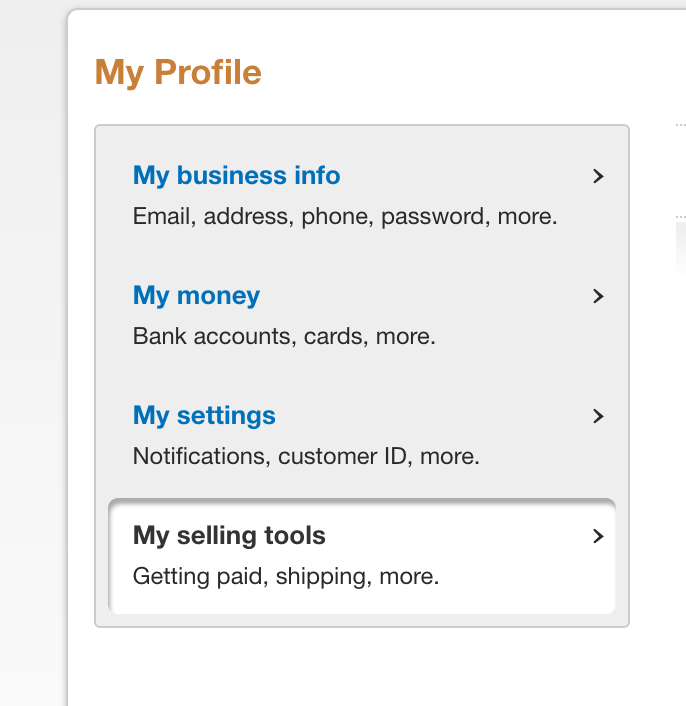
Now it’s time to setup PayPal. Open it up, log in, and then go to Profile > Profile & Settings. This is where you will setup your printer. I have a business account with PayPal, so a personal account may look different. Just do a quick Google search if your menu looks different.
On the left hand menu, click “My Selling Tools” and scroll down to shipping preferences.
 You can edit your shipping address and your printer settings in here. This is where (if you’re using a laser/ink jet printer) you can turn off receipts so that you can print 2 labels to a page!
Once you’re all set up, scroll back up to the top menu, click on tools, and scroll down to Multiorder Shipping. You’ll probably have to click continue after a warning it gives with browser capabilities, and you’ll probably think.. woah.. what is this website from the 90’s?! Don’t fret, it’s legit, and not as scary as it looks the first time 😉
There will be a pop up window that looks like this:
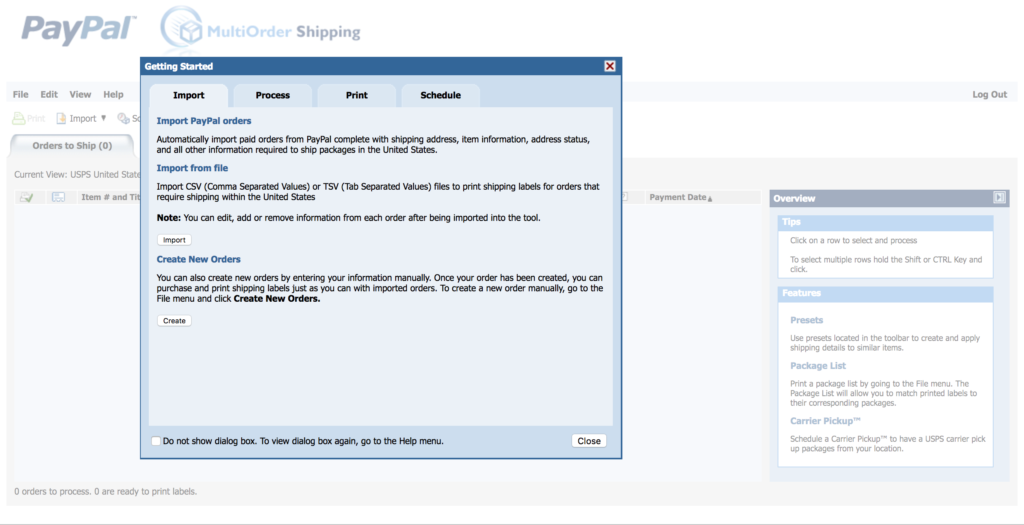
Close that for now, so that we can set up your printer settings!
Go to Edit > Settings > Print Settings, and mirror what you set up in your PayPal account!
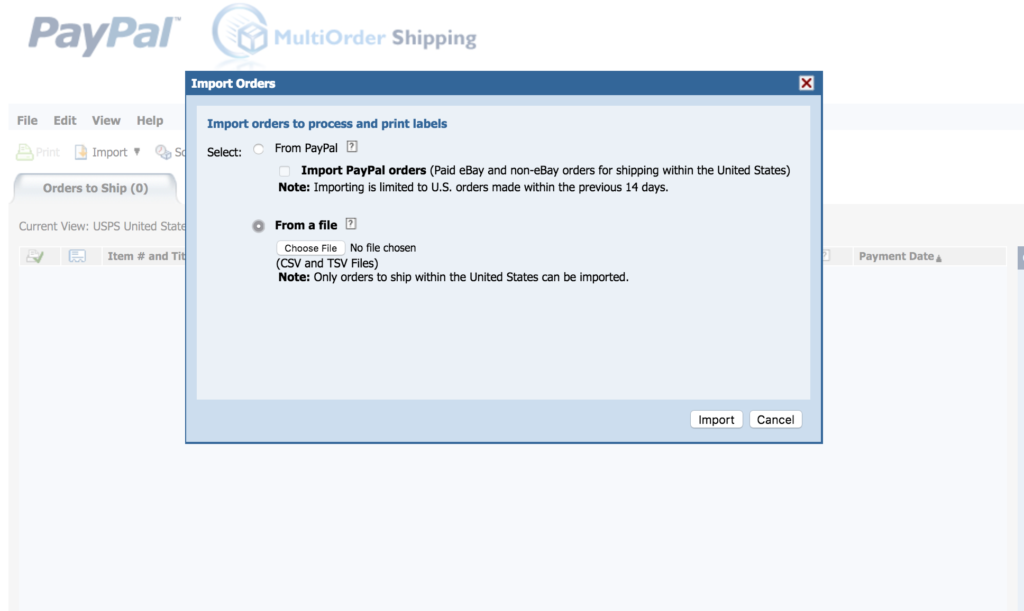
Click apply, and okay, and then once you’re at the main menu, click import!
You’re going to import that .CSV file we saved earlier!
Then you’ll want to “map” your fields. Drag the corresponding columns from your excel sheet to PayPal’s mapping. And then save it so you just have to click one button next time! 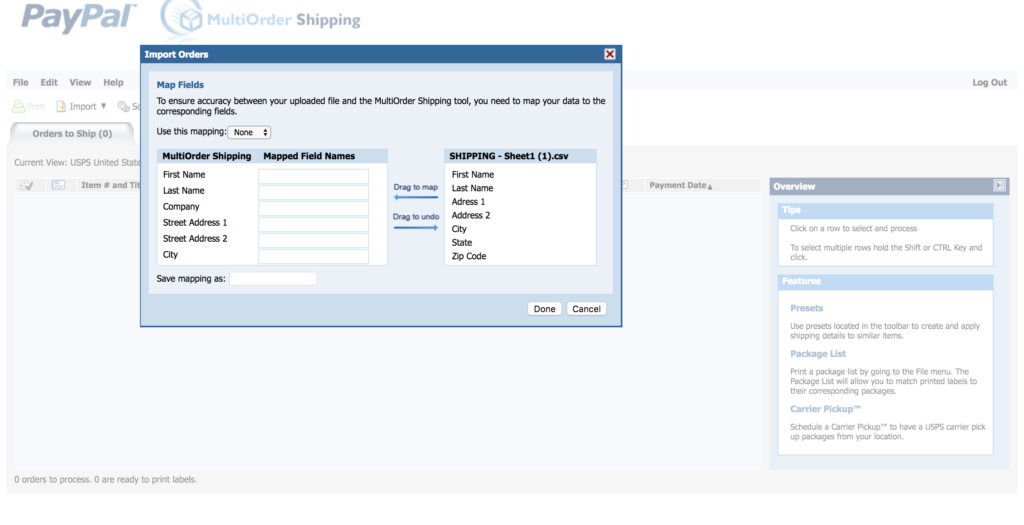
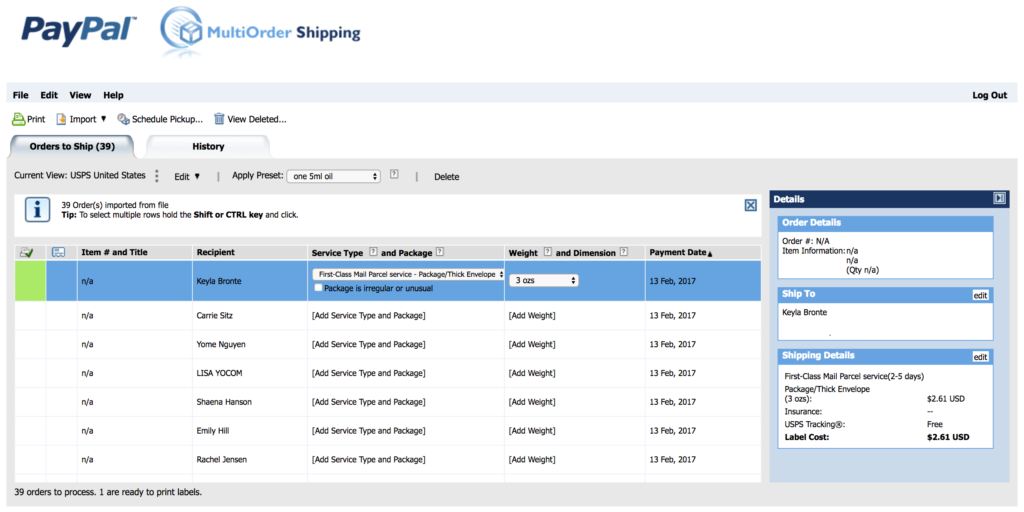
Click done, and wait a couple seconds while it all loads! Now you get to assign weights & services to each package. This might be the tricky part, so read this explaining what different services USPS offers. When I first started doing this, I took a couple different types of packages that I needed to send, and went straight to USPS and had them walk me through how I could send them. I would suggest doing the same if their site doesn’t help you! (When I ship one or two oils I send via Large envelope Parcel Service because they’re under 13 oz. If you’re shipping books you can send via Media Mail–but just know magazines do not count as media mail because of the ads in them!)
Then add your presets, or manually select shipping services to all the imported names.
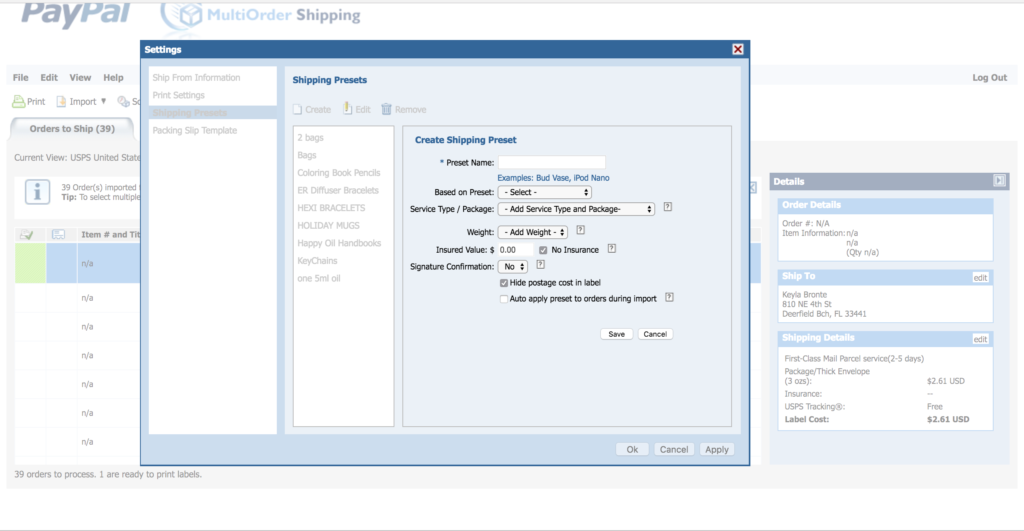
Yes, I said presets!!! The amazing thing is, once you understand the shipping services, you can create preset for items you ship often, and quickly apply them to what you’ve imported! There’s a little drop down menu that you’ll see says “Apply Preset” Click on that, drop down to “create preset” and then set it all up!!
You’ll then click the “Print Preview” tab, and select pay & print! A new tab will pop up, and you’ll be walked through printing through your computer’s printer dialogue. Make sure everything looks good (adjust margins and paper size if needed) and print!!!
Slap the labels on your packages, and then…..
GO SCHEDULE A PICK UP!!! Yep, you can request that your mail carrier picks up your packages from your house!
HOLLA! YOU ARE ALL DONE. Wipe those hands, and go do something fun with the time you just saved!
(But just know, there is a bit of a learning curve when you’re first starting this. Figuring out what to ship packages as, setting this all up, etc. But once you get it, create your presets, etc, you will literally fly through this process. It truly has saved me SO much time now, but I wanted to give up at the beginning. That’s when I went and asked a post office worker to walk me through everything, and once he did it clicked!!!)
You’ve got this friend! ????
(if you buy a thermal label printer, just watch a couple YouTube videos on what settings you need for setting it up! It’s super easy, but it will just depend on what printer you choose!


